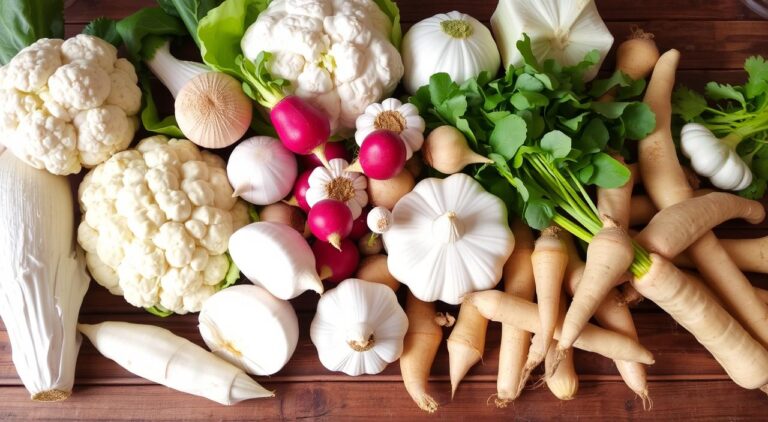
Growing Luffa Vegetable Sponge: Natural Bath Essential
Growing Luffa Vegetable Sponge: Natural Bath Essential
Explore the fascinating world of the luffa vegetable sponge. It’s a natural wonder that’s become a hit as a green bath essential. This guide will take you through its origins, benefits, and how to grow it at home. It’s perfect for both experienced gardeners and newbies looking to live more sustainably.
By growing your own luffa sponges, you can have a green source of bath products. This supports living in a way that’s good for the planet. You’ll learn how to make luffa sponges a valuable part of your life.

Key Takeaways
- Luffa vegetable sponges are natural, biodegradable, and environmentally-friendly alternatives to synthetic bath accessories.
- Growing your own luffa sponges allows you to cultivate a sustainable source of bath essentials and supports self-sufficient living.
- Luffa plants are versatile, with a wide range of traditional and modern uses, from personal care to household cleaning.
- Cultivating luffa sponges requires specific growing conditions, including well-drained soil, ample sunlight, and proper training and support.
- Harvesting and processing luffa sponges can be a rewarding process, providing you with a unique, natural bath product.
What Is a Luffa Vegetable Sponge and Its Origins
Have you ever wondered about the exfoliating shower sponge or vegan bath sponge in your bathroom? They likely come from the humble luffa vegetable. Also known as loofah, this plant belongs to the Cucurbitaceae family. This family includes cucumbers, squash, and melons.
Traditional Uses Throughout History
Luffa sponges have been around for centuries. In ancient Egypt, they were used for cleaning and exfoliating. They were a key part of bathing rituals.
In China and Japan, luffa has been a big part of bathing and skin care for a long time.
Botanical Classification and Characteristics
The luffa plant grows fast and can get up to 15 feet long. Its green, oblong fruits turn into a fibrous, sponge-like interior. This is what we call the exfoliating shower sponge or organic body scrubber.
The plant’s leaves are big and broad. It also has yellow flowers that turn into the luffa “sponges”.
“Luffa sponges have been used for centuries in various cultures around the world.”
Benefits of Growing Your Own Natural Loofah
Are you tired of using bath sponges full of chemicals? Growing your own eco-friendly loofa, or plant-based loofah sponge, is a great idea. It’s better for the planet and can be made just the way you like it, saving you money too.
Homegrown luffa sponges are good for the environment. They break down easily, unlike synthetic sponges, and don’t harm the planet. Plus, growing them uses less resources and no harmful chemicals.
Another plus is you can make it just right for you. Want it softer or firmer? Bigger or smaller? You can adjust it all to fit your needs. This makes your bath time special and personal.
Also, making your own luffa sponge can save you money. You won’t have to buy expensive bath stuff anymore. This can really add up over time.
“Growing your own luffa sponge is a truly rewarding experience that allows you to enjoy a sustainable, customized, and cost-effective bathing routine.”
So, why use synthetic bath sponges when you can have a natural one? Try growing your own eco-friendly loofa. It’s a fun way to make your bath time better for you and the planet.
Essential Growing Requirements for Luffa Plants
To grow luffa plants, you need to know the right conditions. These plants are special and need specific care. This ensures you get a lot of sustainable sponges.
Soil Preparation and pH Levels
Luffa plants do best in soil that drains well and is rich in nutrients. The soil should be slightly acidic, between 6.0 and 6.8 pH. Adding compost or aged manure can make the soil better.
Preparing the soil well before planting is very important. It helps the plants grow healthy and strong.
Sunlight and Temperature Needs
Luffa plants love the sun and need at least 6 hours of direct sunlight daily. They grow best in warm temperatures, between 70°F and 85°F (21°C to 29°C). A sunny spot that is also sheltered is best for growing these sponges.
Water and Humidity Requirements
Luffa plants need consistent moisture. They should get about 1 to 2 inches (2.5 to 5 cm) of water each week. This can come from rain or irrigation. Keeping the humidity around 60-70% also helps them thrive.
Watering and keeping the right humidity are key. They help make the sponges last longer and work better.
By knowing and following the right growing conditions, gardeners can grow a lot of luffa plants. These plants are great for making natural, sustainable sponges for your shower.
When and How to Plant Luffa Seeds
Planting luffa seeds is exciting and can lead to a lot of natural loofah harvests. It’s important to know when and how to plant these seeds.
The best time to plant luffa seeds is in the spring, after the last frost. This lets the plants grow well in the warm, sunny weather they love. Before planting, soak the seeds in water for 24 hours to help them grow faster.
- Choose a spot with well-draining, rich soil that gets at least 6 hours of direct sunlight a day.
- Plant the seeds 1 inch deep and 12 to 18 inches apart. Space the rows 3 to 4 feet apart.
- Water the soil well after planting. Keep it moist during germination, which takes 7 to 14 days.
Once the seedlings grow, they become strong vines up to 12 feet long. With the right care and support, you’ll soon have your own natural luffa sponges!

| Planting Tip | Recommended Practice |
|---|---|
| Soil Preparation | Amend with compost or well-rotted manure to enhance nutrient content and drainage |
| Seed Spacing | Plant luffa seeds 12-18 inches apart in rows spaced 3-4 feet apart |
| Watering | Keep soil consistently moist throughout the germination and growth stages |
“Growing your own luffa vegetable sponges is a rewarding and sustainable way to enjoy natural, zero-waste bath and body products.”
With the right timing and care, you’ll have a lot of homegrown luffa sponges. Use them in your self-care routine or share with friends. Happy planting!
Supporting and Training Your Luffa Vines
As your luffa plants grow, they need the right support to thrive. They are vigorous climbers that need a sturdy trellis or arbor. This keeps them off the ground and boosts their productivity.
Trellis Systems and Support Structures
Set up a trellis or arbor when planting luffa seeds. It can be a simple wire or wooden frame or a custom-built structure. Make sure it’s at least 6 feet tall and can hold the mature vines and luffa gourds.
- Build a trellis with wooden posts and wires or bamboo poles to guide the vines.
- Make an arbor or pergola with wooden beams or metal arches for the vines to climb.
- Use Velcro strips or soft ties to gently tie the vines to the support as they grow.
Pruning and Maintenance Tips
Regular pruning and maintenance are key for healthy luffa vines. As they mature, they might need trimming to remove damaged or unproductive growth.
- Remove dead or diseased leaves or stems to encourage new growth.
- Pinch or snip the growing tips to promote side shoots and more luffa gourds.
- Clear weeds or vegetation around the plants to ensure they get enough nutrients and water.
With the right support and regular pruning, you can create perfect conditions for a bountiful harvest. This will give you plenty of natural vegan bath sponge and organic body scrubber materials.
| Support System | Benefits |
|---|---|
| Trellis | Provides sturdy structure for vines to climb, keeps fruits off the ground |
| Arbor | Offers overhead support and shading, creates a decorative element in the garden |
| Velcro Ties | Gentle, adjustable method to secure vines to support system as they grow |
Common Pests and Diseases in Luffa Vegetable Sponge
Growing your own plant-based loofah sponge is rewarding. But, you should know about pests and diseases that can harm your plants. Knowing these challenges and using organic ways to prevent and treat them helps keep your garden healthy.
Pest Identification and Management
Cucumber beetles are common pests of luffa plants. They can eat the leaves and stems, slowing down the plant’s growth. You can control them by picking them off by hand or using neem oil.
Spider mites are another problem. They make the leaves turn yellow and wilt. To fight them, mist your plants often and introduce beneficial mites.
- Cucumber beetles
- Spider mites
- Aphids
- Powdery mildew
Tackling Common Diseases
Powdery mildew is a fungal disease that can cover your plants in a white powder. To stop it, make sure there’s good air flow and use a baking soda solution.
Bacterial wilt is another disease that can kill your plants. To avoid it, keep your garden clean and remove any sick plants.
| Pest/Disease | Symptoms | Organic Treatment |
|---|---|---|
| Cucumber Beetles | Chewing on leaves and stems | Hand-picking, neem oil |
| Spider Mites | Discoloration and wilting of leaves | Frequent misting, introducing beneficial predatory mites |
| Powdery Mildew | White, powdery coating on leaves and stems | Maintain good air circulation, baking soda solution |
| Bacterial Wilt | Wilting and eventual plant death | Disinfect tools, remove infected plant material |
By watching for pests and diseases and using organic methods to fight them, you can keep your eco-friendly loofa garden healthy. This way, you’ll have plenty of natural, plant-based loofah sponges to harvest.

Harvesting Your Natural Bath Sponges
Harvesting your own exfoliating shower sponge or biodegradable luffa is a fun and rewarding part of gardening. To get the best quality, timing is key. We’ll look at how to know when they’re ready and how to harvest them right.
Signs of Readiness
The best time to pick your luffa sponges is when the vines start to turn yellow. This usually happens 4-6 months after planting, depending on your area. Here are some signs to watch for:
- Luffa sponges should be tan or light brown, feeling dry and papery.
- The outer skin should start to crack, showing the sponge’s inside.
- The plant’s vines and leaves will turn yellow and die as the sponges get ready.
Proper Harvesting Techniques
When your luffa sponges are ready, it’s time to pick them carefully. Follow these steps to get the most from your natural bath accessories:
- Use clean, sharp tools to cut the sponges from the vine, leaving a bit of stem.
- Brush off dirt gently, being careful not to hurt the sponge.
- Hang the sponges in a warm, dry spot with good air to dry for a few weeks.
- After drying, store them in a cool, dry place until you’re ready to use them.
With the right timing and care, your homegrown exfoliating shower sponge or biodegradable luffa will give you a luxurious bath for years.
Processing and Preparing Luffa for Use
Growing your own botanical shower accessory is rewarding. But, it’s not just about picking the luffa. You need to process it to make it into something special. Let’s look at how to get your luffa ready for use or as a gift.
Cleaning and Drying the Luffa Sponges
First, wash the luffa sponges under cool water. This removes dirt and debris. Then, dry them in a place with good air flow. It might take a few days, depending on where you live.
Removing the Seeds
After drying, remove the seeds from the luffa. Open the sponge lengthwise and take out the seeds. You can save them for planting later or throw them away.
Trimming and Shaping the Luffa
Now, trim and shape the luffa to your liking. Use a sharp knife or scissors to make it smooth and even. This makes it look nice and ready to use.
Your botanical shower accessory is ready! You can use it as a bath sponge or for cleaning. These sustainable sponges bring a natural beauty to your daily life.
“Cultivating and processing your own luffa sponges is a deeply satisfying experience that connects you to the natural world.”
Creative Uses for Homegrown Botanical Shower Accessories
Natural loofahs are more than just bath sponges. They can be used in many creative ways. This turns your luffa plants into useful and fun shower items.
Bath and Body Applications
Discover new uses for your natural loofah in your self-care routine. Cut a dried luffa into discs for vegan bath bombs. These bombs clean and exfoliate your skin gently.
You can also make a loofah soap holder. This adds a rustic touch to your bathroom. It’s also zero-waste.
Household Cleaning Solutions
Luffa is great for cleaning your home. Use it to scrub pots, remove stains, or clean grout. It’s biodegradable, so it’s better for the environment than synthetic sponges.
| Natural Loofah Applications | Benefits |
|---|---|
| Bath Bombs | Gentle exfoliation, nourishing skin |
| Soap Holders | Sustainable, adds natural charm |
| Household Cleaning | Abrasive, biodegradable |
Get creative with your natural loofahs. They can make your bath time luxurious and your cleaning eco-friendly. These plants can make your daily life better and more enjoyable.
Storing and Maintaining Your Natural Loofahs
Keeping your eco-friendly loofa or biodegradable luffa sponges in good shape is key. This ensures you get the most out of them. Here are some easy tips for storing and caring for your natural loofahs.
First, wash your luffa sponges with warm water and a gentle soap. Scrub off any dirt or debris. Then, let them dry completely. Store them in a mesh bag or a container that lets air through. Don’t put them in airtight plastic, as it can cause mold and mildew.
To keep them in top condition, switch between your loofahs. This stops one from getting too wet or worn out. With the right care, your eco-friendly loofa and biodegradable luffa sponges will last for months. They’ll give you a soft and gentle exfoliating experience every time.
FAQ
What is a luffa vegetable sponge?
A luffa vegetable sponge, also known as a natural loofah, is made from the dried flesh of the luffa plant. It’s a biodegradable and exfoliating shower accessory. It’s a green alternative to synthetic bath sponges.
What are the traditional uses of luffa sponges throughout history?
Luffa sponges have been used for centuries. They were used for natural cleansing and exfoliating. They were also used in bathing rituals and for medicinal purposes.
What are the benefits of growing your own natural luffa sponges?
Growing your own luffa sponges is sustainable and cost-effective. You can customize their size and texture. They are also better for the environment than synthetic sponges.
What are the essential growing requirements for luffa plants?
Luffa plants need well-draining, nutrient-rich soil and a slightly acidic pH. They thrive in full sun and warm temperatures, between 70-85°F. They also need consistent watering and moderate humidity.
When and how should I plant luffa seeds?
Plant luffa seeds in the spring or early summer, after the frost danger has passed. Soak the seeds in water for 24 hours. Plant them 1-2 inches deep and 6-12 inches apart in well-prepared soil. Germination takes 7-14 days.
How do I support and train my luffa vines?
Luffa vines need a sturdy support system like a trellis or arbor. Prune and train the vines regularly. This helps maximize luffa production and ensures proper sponge development.
What common pests and diseases should I watch out for when growing luffa?
Watch out for aphids, spider mites, powdery mildew, and bacterial wilt. Use organic methods to keep your plants healthy. Regular monitoring can help prevent and manage these issues.
How do I know when to harvest my luffa sponges?
Luffa sponges are ready when the vines turn brown and the sponges inside the pods are fibrous and dry. This is usually 4-6 months after planting. Cut the sponges from the vine, leaving a small stem attached.
How do I process and prepare my harvested luffa sponges?
After harvesting, clean, dry, and remove the seeds from the luffa sponges. Soak, scrub, and dry them in the sun or a dehydrator. They must be completely dry before use.
What are some creative uses for homegrown luffa sponges?
Luffa sponges can be used for more than just bathing. They’re great for natural skin care, cleaning solutions, and as decorative botanical accessories.
How do I properly store and maintain my natural luffa sponges?
To keep your luffa sponges in good condition, store them in a cool, dry place. Rotate their use and clean and dry them regularly. This prevents mold and bacteria growth.